How We Polish Screens - The Professional Process
At onoff.gr we don't just "polish" screens - we follow a four-step process refined over thousands of device repairs. The best part? We never remove the screen! The entire process happens with your device intact, preserving its authenticity and safety.

Why We DON'T Remove the Screen
- ✅ Preserves factory waterproofing of your device
- ✅ Zero risk of damage to internal mechanisms
- ✅ Faster process - no time wasted on disassembly
- ✅ Warranty stays intact from manufacturer
- ✅ Your data is 100% safe - we never touch the motherboard
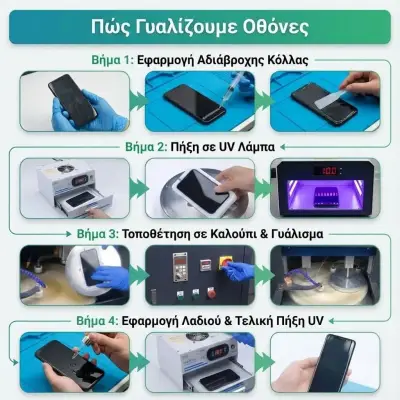
The Step-by-Step Process
Waterproof Adhesive Application
The first and most critical step is protecting your device. We apply special waterproof UV adhesive (Ultraviolet-curable adhesive) around all ports, buttons, and sensitive areas.
Why UV Adhesive?
- • Creates an absolutely waterproof barrier
- • Cures only under UV light - we have complete control
- • Removes easily afterward without residue
- • Doesn't harm the device in any way
We carefully seal microphones, speakers, charging ports, volume/power buttons, even microscopic gaps between screen and frame. Every detail matters!
UV Lamp Curing
We place the device in a professional UV lamp for 3-5 minutes. The ultraviolet radiation "cures" the adhesive, creating a rigid, waterproof barrier.
Technical Details:
- • UV wavelength: 365-405nm (optically safe)
- • Exposure time: 180-300 seconds depending on model
- • Operating temperature: 25-35°C (device stays cool)
- • Controlled intensity for uniform curing
Our UV lamp is specifically designed for smartphone repairs - not the type used in nail salons! It has precisely the right wavelength and intensity to cure the adhesive without damaging OLED/AMOLED screens.
Fixture Mounting & Mechanical Polishing
Now comes the main event! We mount the device (with its fully protected screen) in a specialized fixture that holds it steady and secure.
The Polishing Machine:
We use a professional polishing machine with rotating pads of different grits. The machine differs from standard polishing equipment with:
- • Controlled pressure (0.5-2 kg/cm²)
- • Adjustable speed (500-3000 RPM)
- • Air cooling to prevent overheating
- • Auto-stop on excessive pressure
The Polishing Stages:
Stage 1 - Coarse Polishing
Using rough compound (3000-5000 grit) to remove deeper scratches. Here we "level" the surface.
Stage 2 - Medium Polishing
Medium-grit compound (7000-9000 grit) for smoothing and removing traces from stage one.
Stage 3 - Fine Polishing
Ultra-fine compound (12000+ grit) for mirror finish and final shine. The screen regains its glossy finish.
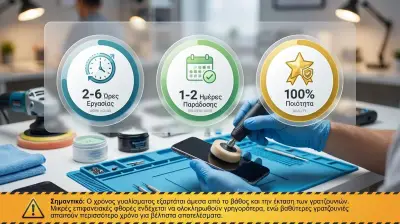
Total polishing time: 2-6 hours depending on scratch depth and extent.
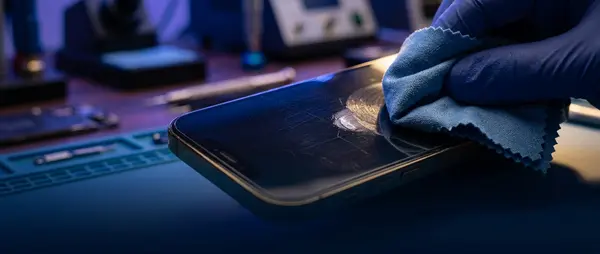
Oil Application & Final UV Curing
The coating application completes the restoration. We apply special "setting oil" (oleophobic coating) that:
- ✅ Protects the screen from grease and fingerprints
- ✅ Creates a waterproof surface (oleophobic + hydrophobic)
- ✅ Maintains the shine we achieved through polishing
- ✅ Improves touchscreen responsiveness
What is Oleophobic Coating?
It's the same coating that all new screens have from the factory! With use it gradually wears away - we restore it after polishing, returning your screen to factory condition.
Final Curing:
We place the device back in the UV lamp for 2-3 minutes to dry and stabilize the oleophobic coating. Meanwhile, we carefully remove the protective adhesive from step 1.
The Result?
A screen that looks almost brand new! Scratches have vanished (or dramatically reduced), shine has returned, and touch feels smooth and natural. All this without ever removing the screen from your device!
The Result: Before & After

The transformation removes years of wear and tear. From a scratch-covered screen to one that looks almost new. Best part? You kept your genuine screen - we didn't replace anything!
Quality Control
What we check before delivery:
- Visual inspection: Light examination for any remaining scratches
- Touch test: Testing all touchscreen points
- Moisture check: Ensuring no moisture entered during process
- Cleaning: Removing all compound and adhesive residue
- Final function test: Brightness, colors, sound, buttons
When we reject the result:
- If visible scratches remain
- If cloudy areas exist
- If touchscreen doesn't respond perfectly
- If material residue remains
Important: If we're not 100% satisfied with the result, we repeat the process or suggest replacement (with discount for the attempt).
How Long Does It Take?
Waterproof adhesive application & UV curing
Mechanical polishing (3 stages: 3000/7000/12000 grit)
Oleophobic coating application, final UV curing & cleaning
Quality control & final cleaning
Total time: 2-6 hours
(Depending on model and scratch extent)