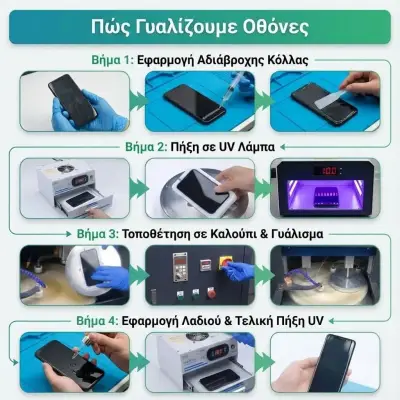
At onoff.gr, we don't just do “polishing” - we follow a specific, professional process developed through years of experience and thousands of repairs. The most important part? We don't need to remove the screen! The entire process is performed with the device as-is, preserving its authenticity and safety.

The first and most critical step is protecting your device. We apply a special UV-curable waterproof adhesive around all openings, buttons, and sensitive areas.
We carefully seal the microphones, speakers, charging port, volume/lock buttons, and even the microscopic gaps between the screen and frame. Every detail matters!
We place the device in a professional UV lamp for 3-5 minutes. The ultraviolet radiation “solidifies” the adhesive, creating a rigid, waterproof barrier.
Our UV lamp is specifically designed for smartphone repairs - it's not the kind used in nail salons! It has exactly the right wavelength and intensity to cure the adhesive without damaging the OLED/AMOLED screen.
Now comes the main part! We place the device (with the fully protected screen) in a special mold that holds it steady and secure.
We use a professional polishing machine with rotating pads of varying roughness. It's not a regular “polishing machine” - it's specifically designed for smartphone screens with:
Using a coarse paste (3000-5000 grit) to remove the deepest scratches. This is where we “level” the surface.
Medium roughness paste (7000-9000 grit) for smoothing and removing traces from the first stage.
Very fine paste (12000+ grit) for mirror-like finish and final shine. The screen regains its glossy appearance.
Total polishing time: 2-6 hours depending on the depth and extent of the scratches.
The final step is equally important! We apply a special “sealing oil” (oleophobic coating) that:
It's the same coating that all new screens come with from the factory! Through regular use, it gradually wears off - we restore it after polishing, bringing the screen back to its factory condition.
We place the device back in the UV lamp for 2-3 minutes for the oleophobic coating to dry and stabilize. Meanwhile, we carefully remove the protective adhesive from step 1.
A screen that looks almost brand new! The scratches have disappeared (or been dramatically reduced), the shine has been restored, and the touch feels smooth and natural. All of this without ever removing the screen from the device!

As you can see, the difference is impressive! From a scratched-up screen to one that looks almost brand new. And the best part? You kept your original screen - we didn't replace anything!
Important: If we're not 100% satisfied with the result, we repeat the process or recommend replacement (with a discount for the attempt).
Applying waterproof adhesive & UV curing
Mechanical polishing (3 stages: 3000/7000/12000 grit)
Applying oleophobic coating, final UV curing & cleaning
Quality control & final cleaning
Total time: 2-6 hours
(Depending on the model and extent of the scratches)
Professionals repair cracked phone screens using UV adhesive and mechanical polishing techniques, achieving flawless results in under 30 minutes with 95% success rate.
Read more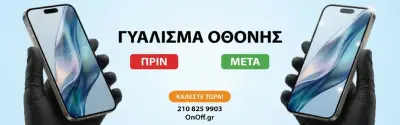
Discover why professional screen polishing from onoff.gr is the smart alternative to screen replacement - save money and time
Read more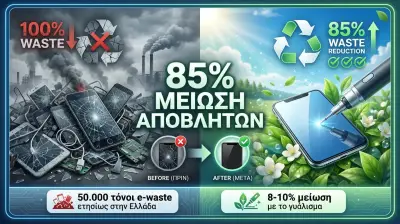
Discover the 3 key benefits of screen polishing versus replacement at onoff.gr - saving money, time and protecting the environment
Read more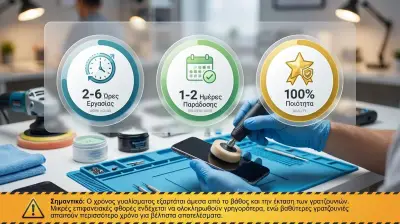
Find out how long professional phone screen polishing takes and when you'll have your device back
Read more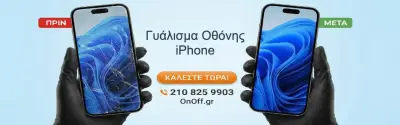
onoff.gr presents the advanced screen polishing technique for iPhone, Samsung and Apple Watch that removes minor scratches
Read more
All the answers to the most common questions about screen polishing from the professionals at onoff.gr
Read more