Backing up your iPhone isn't a luxury — it's an absolute necessity. Photos, messages, contacts, app settings, health data, passwords — everything can be lost in seconds due to an accident, theft, or hardware failure. Apple offers three primary backup methods: iCloud, Mac/PC via Finder/iTunes, and external drive. In this complete guide, we break down each method step by step, what each backup includes, how to restore, and which method to choose based on your needs.
Why You Need a Backup — Now
Studies show that 30% of smartphone users have never backed up their device. Meanwhile, 1 in 10 phones is lost or stolen every year, and thousands of devices suffer damage from water, drops, or corrupted software. Without a backup, anything not stored in the cloud is permanently lost.
A backup saves you in many scenarios: switching to a new iPhone, recovering after damage or theft, retrieving deleted data, after a failed iOS update, or even for testing iOS beta versions risk-free. Experts recommend the 3-2-1 rule: three copies, on two different media types, one off-site (cloud).
Method 1: iCloud Backup
iCloud backup is the easiest and most automatic method. It works wirelessly in the background without any action required — as long as three conditions are met: Wi-Fi connection, connected to power, and the screen is locked.
How to Enable Automatic iCloud Backup
- Open Settings
- Tap your name at the top (Apple ID)
- Tap iCloud
- Tap iCloud Backup
- Toggle on Back Up This iPhone
Once enabled, your iPhone backs up automatically every night — as long as it's connected to Wi-Fi, charging, and the screen is locked. You can also trigger a manual backup anytime by tapping Back Up Now on the same screen.
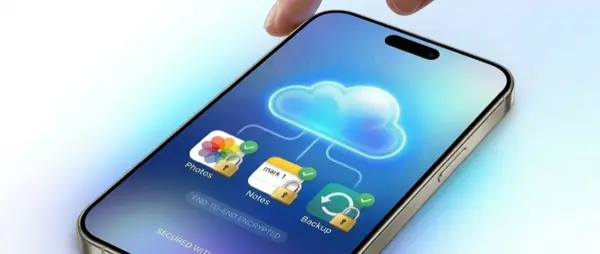
What iCloud Backup Includes
- App data
- Device settings and Home Screen layout
- iMessage, SMS, MMS (if not using Messages in iCloud)
- Photos and videos (if not using iCloud Photos)
- Purchase history (apps, music, books)
- Apple Watch backup settings
- Wi-Fi passwords
- Ringtones and Visual Voicemail
- Health data (encrypted)
- HomeKit configuration
Important: If you already use iCloud Photos and Messages in iCloud, that data syncs separately with iCloud — it's not included in the backup because it's already there. This means your backup size may be significantly smaller than expected.
iCloud Storage Pricing
Apple offers 5 GB of free iCloud storage — which is almost never enough for a backup. iCloud+ plans cost:
- 50 GB: $0.99/month
- 200 GB: $2.99/month
- 2 TB: $9.99/month
- 6 TB: $29.99/month
- 12 TB: $59.99/month
For most users, 50 GB ($0.99/month) or 200 GB ($2.99/month) is sufficient. If you share storage with Family Sharing, 200 GB or 2 TB is ideal.
Method 2: Mac or PC Backup
Local backup to a Mac (or PC) via Finder (macOS Catalina and later) or iTunes (older macOS, Windows) creates a complete copy of your device on your computer's hard drive. This method is faster than iCloud, doesn't require internet, and costs no monthly subscription.
Step-by-Step Mac Backup (Finder)
- Connect your iPhone to your Mac with a USB-C or Lightning cable
- Open Finder
- In the left sidebar, click your iPhone (under Locations)
- In the General tab, view the backup options
- Select "Back up all of the data on your iPhone to this Mac"
- For encrypted backup, check "Encrypt local backup" and create a password
- Click Back Up Now
Step-by-Step PC Backup (iTunes / Apple Devices)
- Download Apple Devices from the Microsoft Store (or iTunes)
- Connect your iPhone to the PC with a cable
- Open Apple Devices/iTunes
- Click on your iPhone
- Click Back Up Now
Backup time depends on data volume. A typical iPhone with 64-128 GB of data takes 15-45 minutes for the first backup. Subsequent incremental backups are significantly faster — usually 5-15 minutes.
Encrypted Backup — Why It's Essential: An encrypted backup stores significantly more data: Wi-Fi passwords, Safari history, Health & Activity data, Keychain passwords, email passwords, and Face ID/Touch ID settings. Without encryption, this data is excluded. Always use encrypted backup.
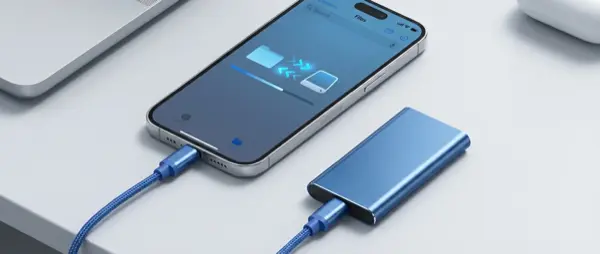
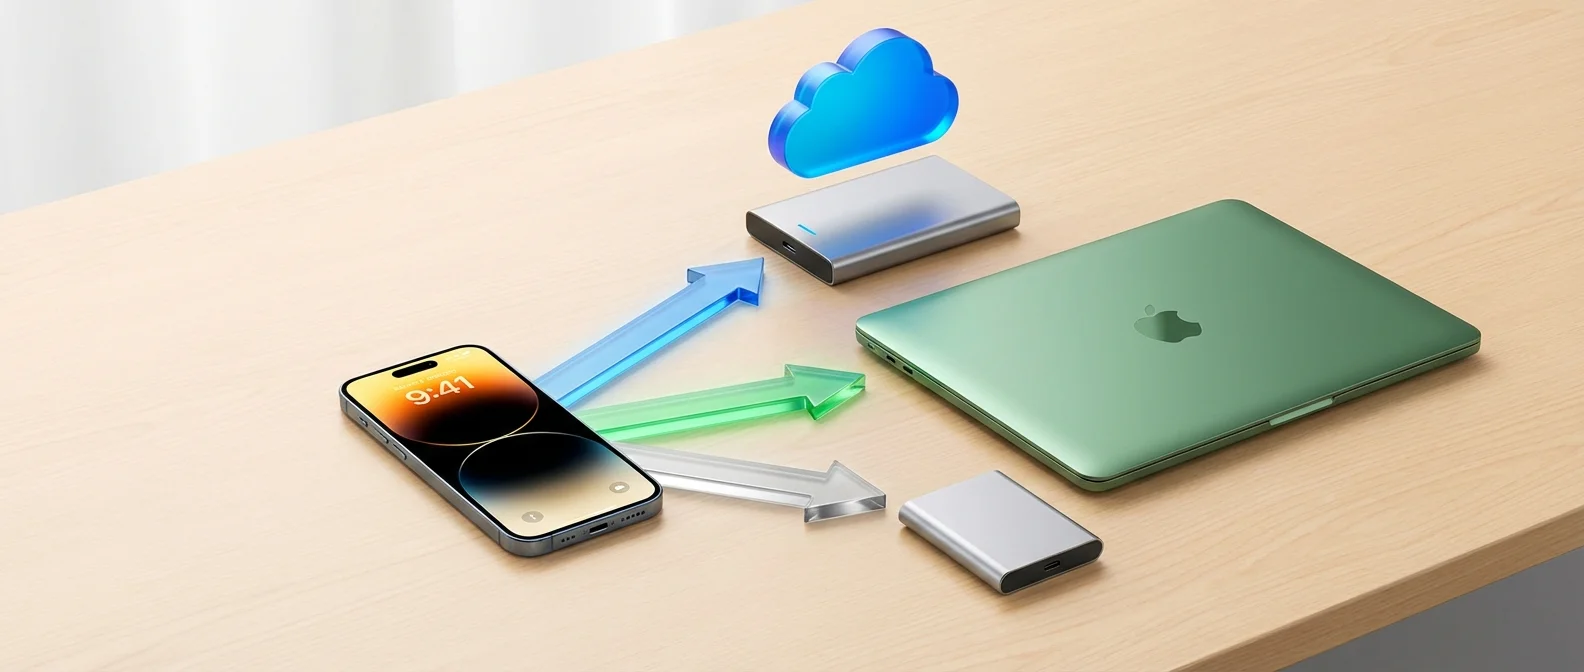
Method 3: External Drive Backup
Storing your backup on an external drive (SSD or HDD) gives you complete independence: no internet required, no subscription fees, and your data stays physically in your hands. This method requires slightly more technical knowledge, but it's worth the effort.
Via Mac (Symlink Method)
Apple doesn't natively offer the option to save backups to an external drive through Finder. However, you can achieve this using a symbolic link (symlink):
- Connect the external drive to your Mac
- Locate the backup folder: ~/Library/Application Support/MobileSync/Backup/
- Move the Backup folder to the external drive
- Create a symlink via Terminal:
ln -s /Volumes/ExternalDisk/Backup ~/Library/Application\ Support/MobileSync/Backup - Run backup normally through Finder — it will automatically save to the external drive
Via iPhone (iOS 18+ Direct File Transfer)
With iOS 18 and later, Apple added native support for connecting external drives directly to iPhone via USB-C. You can copy photos, videos, and files directly to the drive through the Files app. However, this isn't a full backup solution — it's file transfer, not a system backup. For a complete backup on an external drive, you need a Mac or PC.
Comparing Backup Methods
Each method has trade-offs. Ideally, use at least two methods simultaneously:
- iCloud: For daily automatic backup — nothing to remember
- Mac/PC: For periodic full encrypted backup — ideal before iOS updates or device changes
- External drive: For long-term storage or extra security
How to Restore from Backup
Restore from iCloud Backup
- On your new iPhone (or after factory reset), reach the "Apps & Data" screen
- Select "Restore from iCloud Backup"
- Sign in with your Apple ID
- Choose the most recent backup
- Wait for the restoration to complete (15 minutes to several hours, depending on data and internet speed)
Restore from Mac/PC Backup
- Connect the iPhone to your Mac/PC
- Open Finder (Mac) or Apple Devices/iTunes (PC)
- Click on the iPhone
- Click "Restore Backup"
- Select the desired backup
- If encrypted, enter the encryption password
- Wait for completion (typically 10-30 minutes)
Warning: If you forget your encrypted backup password, there's no way to recover it. Apple cannot help you. Write the password down in a secure place or use a password manager.
What's NOT Included in Any Backup
Certain data isn't stored in any backup — neither iCloud nor Mac/PC:
- Data already syncing with iCloud (Photos, Contacts, Calendar, Notes — if using iCloud sync)
- iTunes/Apple Music content (can be re-downloaded)
- Apps themselves (re-downloaded automatically from the App Store)
- Face ID / Touch ID data
- Apple Pay cards (must be re-added)
- Mail account settings (must be reconfigured)
When You Must Back Up
- Before iOS updates: Major updates can occasionally cause issues
- Before switching devices: When buying a new iPhone
- Before repairs: Every time you send your iPhone for service — even for screen or battery replacement
- Before travel: In case of theft or loss
- After important events: Weddings, births, vacations — don't risk the memories
"There aren't two types of people — those who back up and those who don't. There are those who back up and those who haven't lost their data yet."
— Tech ProverbFrequently Asked Questions
How long does an iCloud backup take?
The first backup can take 30 minutes to several hours, depending on data volume and internet speed. Subsequent backups are incremental — only saving changes — and typically take 5-15 minutes.
Can I back up without Wi-Fi?
iCloud backup requires Wi-Fi (or you can use cellular if “Back Up Over Cellular” is enabled). Mac/PC backup needs no internet — just a USB cable.
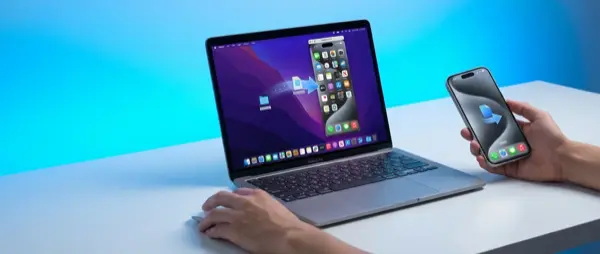
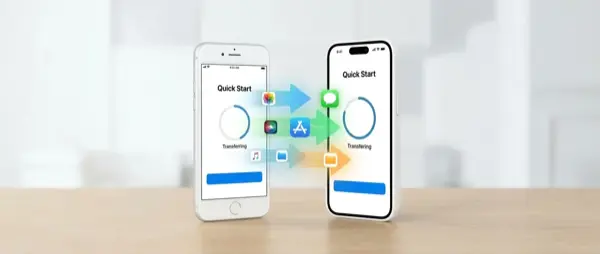
Will I lose data when switching iPhones?
Not if you have a backup. During new iPhone setup, you can restore from iCloud or Mac/PC backup. Alternatively, iOS 12.4+ supports direct iPhone-to-iPhone transfer via “Quick Start” — wirelessly or with a cable.
What should I do before sending my iPhone for repair?
Always back up before handing your device over for service. At OnOff.gr, we always advise customers to back up before bringing in their iPhone. In cases of severe damage (water, broken logic board), a factory reset may be required.