📖 Read more: Camera Control iPhone: Complete Button Guide
1. Burst Mode with Volume Button
Press and hold the volume up button to shoot burst photos — multiple frames captured in fractions of a second ⚡. Perfect for fast action, kids, or pets. On iPhone 11 and later, you can also swipe the shutter button left for burst. In Settings → Camera, there's a “Use Volume Up for Burst” option if you prefer the physical button exclusively. After shooting, the iPhone uses machine learning to automatically suggest the best photos from the sequence.
2. Grid Overlay — Rule of Thirds
Enable the grid in Settings → Camera → Grid . It displays a 3×3 grid that helps you compose using the classic rule of thirds 🎯. Place important elements at the intersection points of the lines — your photos will instantly look more balanced and professional. The grid works across Photo, Video, Portrait, and Pano modes.
3. Timer for Steady Shots
Tap the timer icon in the top bar and choose 3 or 10 seconds ⏱️. Useful not just for selfies but also for avoiding shake in night shots. With the 10-second timer, the iPhone automatically captures 10 burst photos and picks the best ones — ideal for group shots where someone always blinks 😄.
4. Mirror Selfie
In Settings → Camera, enable “Mirror Front Camera” . Your selfie will be saved exactly as you see it on screen, without automatic flipping. This means text on t-shirts or signs will appear correctly. By default, the iPhone mirrors the selfie — a quirk that many users don't even realize they can disable 🪞.
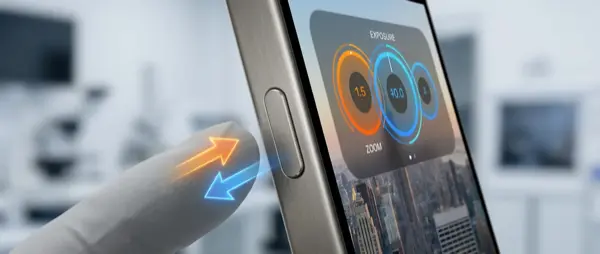
5. Exposure Lock (AE/AF Lock)
Long press any point on the screen until the “AE/AF LOCK” badge appears 🔒. Focus and exposure lock in place — ideal for consistent lighting or when you want to recompose the frame without the brightness changing.
Top Tip: After locking, swipe your finger up/down next to the sun icon to manually adjust exposure. Up = brighter, down = darker. This is essentially manual exposure compensation — a tool that only professional photographers used to have access to.
6. Hidden Camera Level
In Settings → Camera, enable “Level” . A crosshair appears in the center that turns yellow when the iPhone is perfectly straight. Perfect for architectural photography 🏛️, landscape horizons, or flat lay photos. The feature even works in portrait orientation, checking if the camera is tilting left or right.
7. Long Exposure from Live Photo
Take a Live Photo (e.g., waterfall, waves, or nighttime traffic). In the Photos app, swipe up and select Long Exposure ✨. It creates a silky water effect or light trails without a tripod. Live Photo captures 1.5 seconds before and after the shot — enough for stunning effects. Also try the Loop and Bounce effects for creative animations.
8. Quick Take Video
In Photo mode, swipe the shutter button right to instantly start recording video without switching modes 🎬. Swipe left to lock the recording and free your finger. You can also long-press the volume down button for Quick Take. This feature is perfect when you want to capture a moment on video without losing time in the interface.
9. Scan Documents with Camera
Open the Notes app , tap camera → “Scan Documents”. It automatically detects document edges, corrects perspective and skewed angles, and saves as PDF 📄. You can scan multiple pages in sequence. It works equally well from the Files app — long press on the background and select “Scan Documents”.
10. Photographic Styles
In Settings → Camera → Photographic Styles, choose a preset: 🎨 Rich Contrast, Vibrant, Warm, or Cool. Applied in real-time to every photo — not a filter, it changes how the Neural Engine processes highlights, shadows, and colors. On iPhone 16, Apple added Tone and Color (Undertone) sliders for even more granular control. The best part? You can change the Photographic Style after shooting without any quality loss.
"Photographic Styles aren't just filters. They alter the computational pipeline — highlights, shadows, and saturation are processed differently at the hardware level through the Neural Engine."
— AppleBonus Tips
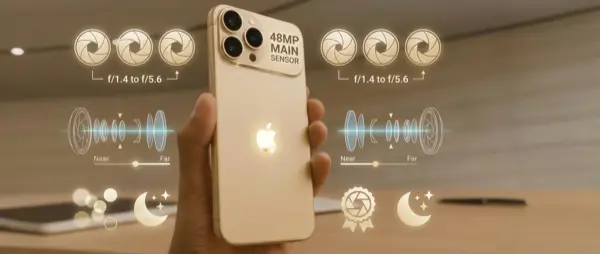
Night Mode: On iPhone 11 and later, it activates automatically in low light. Tap the yellow moon icon to adjust exposure time (1-30 seconds). On a tripod, it unlocks up to 30-second stellar captures 🌟.
Macro Mode: On iPhone 13 Pro and later, the camera automatically switches to macro when you get closer than 2 centimeters to the subject. Ideal for flower details 🌸, insects, or text. Enable “Macro Control” in camera settings for manual switching.
Action Mode: On iPhone 14 and later, tap the Action Mode icon in video for impressive stabilization while running or walking — like using a gimbal 🎥.